Avatar Package
Spatial supports custom avatars from humanoid 3D models. This guide will walk you through the process of creating an avatar package, importing a 3D model, setting up animations, constraints, and how to debug common errors.
Tip
Check out Buddy Blitz for an example of a game that uses custom avatars or the Spatian Astronaut avatar in our Starter Template!
How To Use
You can import most humanoid 3D models into Spatial for use as an avatar.
-
Import a rigged, humanoid 3D model (preferably
.fbx) into Unity. Ensure that the animation type under the Rig tab is set to Humanoid.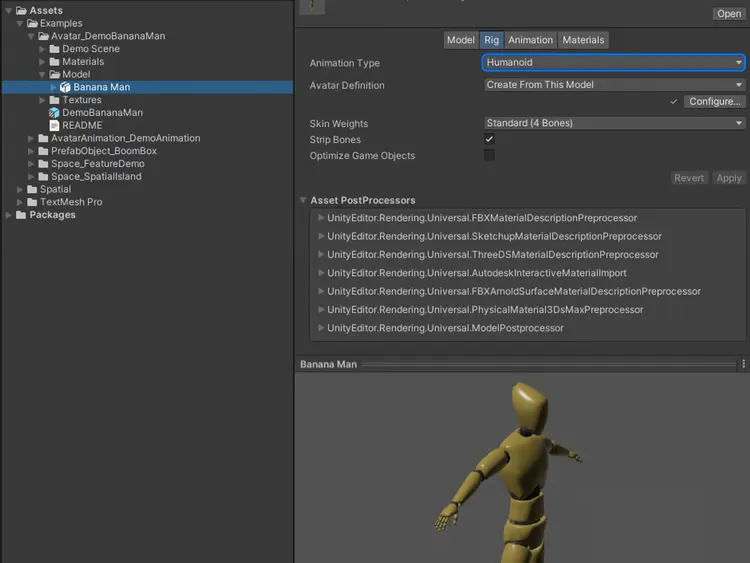
-
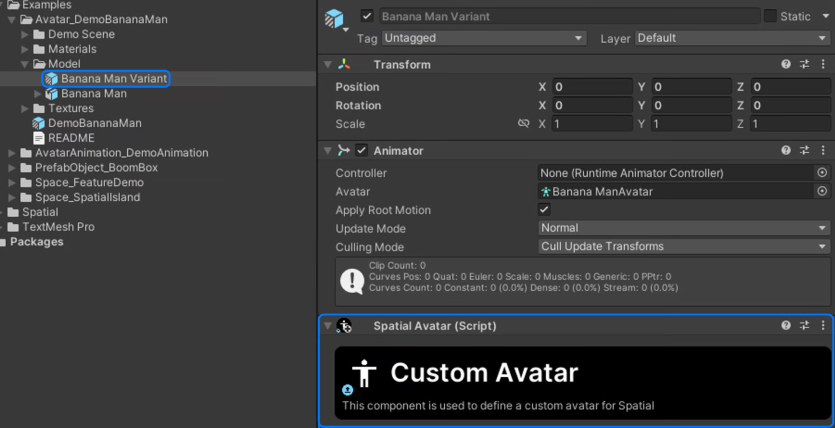
Create a prefab from this model. You can do so easily by right clicking the asset and selecting
Create > Prefab Variant. -
Add the Spatial Avatar component to this newly created prefab.
-
Open the
Spatial Portalby clickingpublishingin the toolbar. Create a new Avatar package under Project Configuration. Drag the prefab variant into the Prefab field. Additionally,you will also need to supply a thumbnail of size 256x256 in an uncompressed format.
Avatar Animations
Each avatar has a set of animations that can be customized, such as walking, running, jumping, etc. You can create your own animations (i.e. in Blender) or find animations online on a platform like Mixamo.

Importing Animations
-
Copy your the animation (preferably
.fbx) into your Unity project. Ensure that the animation type under the Rig tab is set to Humanoid. -
If the animation was created specifically for your avatar, then you can re-use the “Unity Avatar” from your original avatar model. This is recommended because animations will properly be “targeted” to your avatar. This avoids hands clipping through the body and legs.

-
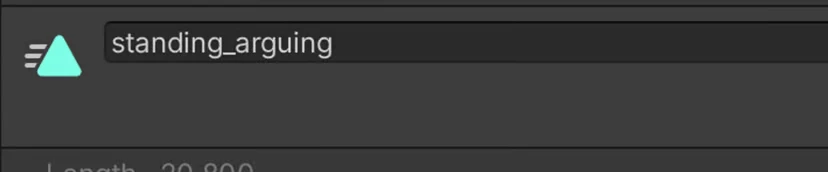
In the “Animation” tab, it is good practice to give your animation a good name:
-
Depending on the animation clip type, you may need to set the animation to loop. For animations that loop (walk, jog, run, fall) you will need to turn this on to be able to publish.

-
Fine-tune the other transform settings like “Root Transform Rotation”, “Root Transform Position (Y)” and “Root Transform Position (XZ)” if your animations don’t look right.
Setting Animations for your Avatar
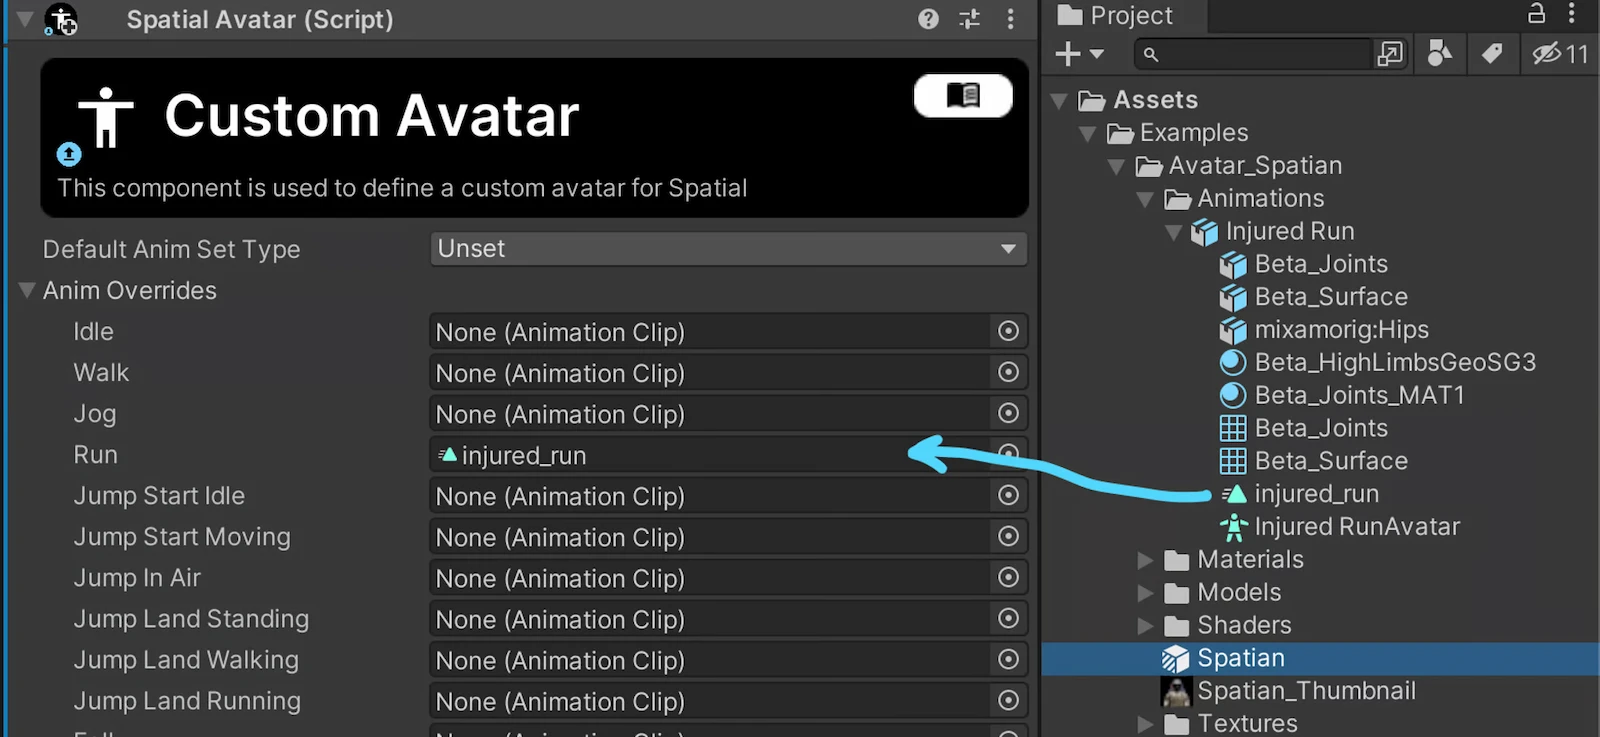
After you have imported a couple of animations into your project, you can assign them to your avatar package. Simply drag the animation clip into your desired animation slot.
Avatar Scope
Universal Avatars
- Universal avatars can be used in any space within Spatial, and represents a more permanent customization of your avatar. Due to this, it has the tightest restrictions to ensure performance and quality meets our standards.
- If a player owns a universal avatar (i.e granted to them from a game), they can equip this as their avatar universally from the avatar customization panel.
World Avatars
- World avatars can only be used in spaces that are within the World where it was granted. These avatars are meant to be more temporary override to Universal avatars (for example, a game character that you can select within a space). This avatar will not be persistent and users will be reset back to their default avatar upon leaving the space.
- These avatars can still be distributed to other users by rewarding them with a backpack item, but they will only be able to “wear” this avatar in the world that it is assigned to. Players are not able to equip this avatar as their universal avatar.
Constraints
To be able to support multiple platforms, including mobile devices, there are restrictions in place to ensure performance is stable for everyone.
These limitations are subject to change at any time.
| Universal Avatar | World Avatar | |
|---|---|---|
| Triangle Count | 22,500 | 200,000 |
| Vertex Count | 50,000 | 200,000 |
| Texture Size Limit | 1024x1024 | 4096x4096 |
| Submesh (Draw Call) Limit | 4 | 100 |
| Physical Dimensions Limit | 2.5m x 2.5m x 2.5m | 25m x 25m x 25m |
| Rig Type | Humanoid | Humanoid |
Common Errors
Here are some common errors you might encounter when creating an avatar package, and how to fix them.
Too Many Vertices
Global avatars can have a maximum of 22,500 triangles.
If yours has more than this, we recommend optimizing your file to reduce the number of triangles and vertices. The Decimate Modifier in Blender is a great tool for optimizing your model.
Too Many Sub-Meshes
Global avatars can have a maximum of 4 sub-meshes.
If you receive the error that your avatar has too many sub-meshes (>4), one approach to solving that problem is combining the material in your model. Here's a great tutorial to reduce the sub-meshes in your model.
Avatar Must Have a Valid Humanoid Rig
In Spatial, your avatar must have 2 arms and 2 legs - a.k.a. “Humanoid”.
If your model already has a Humanoid rig, in Unity click on your avatar in the Project tab, and in the Inspector go to Rig. Under “Animation Type” choose Humanoid, and then Configure.
If you receive an error when configuring your rig in Unity, or do not have a Humanoid Rig set up for your avatar, you need to rig your avatar as humanoid. Here's a great tutorial demonstrating how to do so!
Scale of All Child GameObjects of the Avatar Must be Normalized
We enforce all child GameObjects of the avatar to have a normalized transform scale of (1, 1, 1). This is to ensure that Avatar Attachments have consistent behavior across all published avatars.
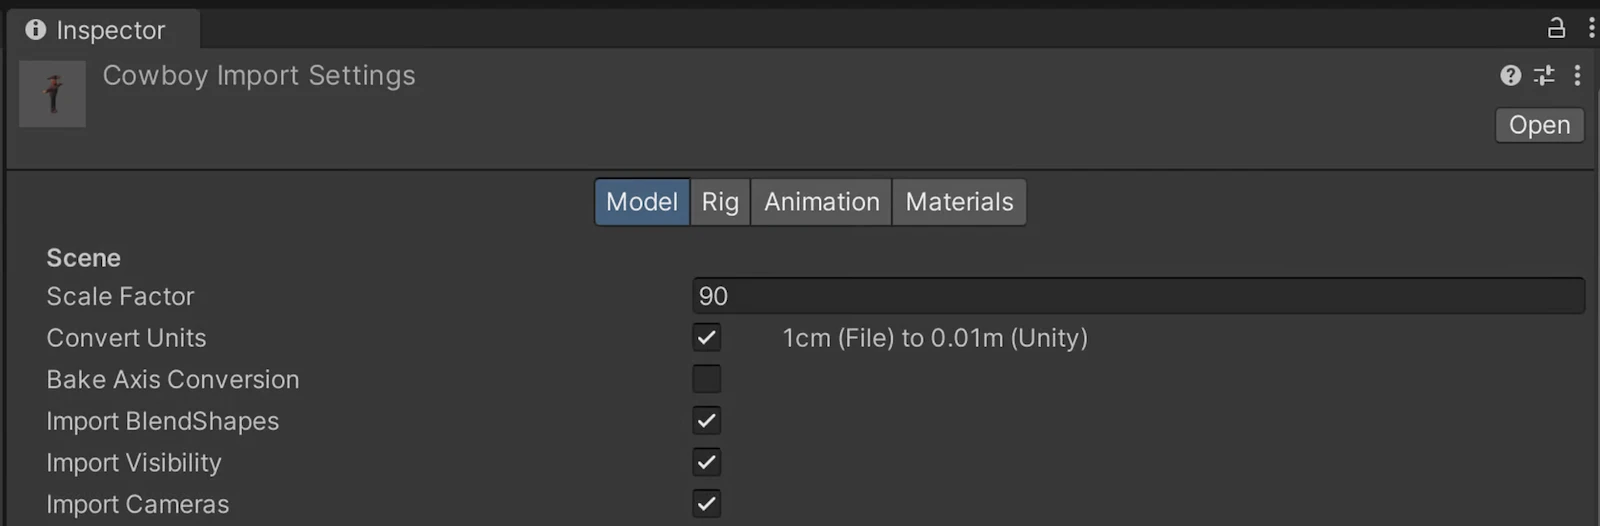
If the root of your avatar’s rig/bone hierarchy (usually the Hip bone) is the only GameObject with a non-normalized scale, you can fix this by changing the Scale Factor under the Model Importer settings. Click on your avatar model in the Project tab and in the Inspector, select Model. Multiply the existing Scale Factor by the scale of your root object and click Apply. After applying the changes, you may need to recreate your avatar prefabs by dragging the model into the hierarchy again, as changing the scale factor may distort the avatar.
In example below, the Scale Factor was previously 1 and the transform scale of the hip bone was (90, 90, 90). To fix this, we multiply Scale Factor by 90 and reset the root bone transform to (1, 1, 1).
If there are multiple nested GameObjects in the avatar’s hierarchy that do not have normalized scale, you will need to go into a 3D modeling program (such as Blender) to fix it manually. This involves resetting the transform of each bone by Applying Delta Transforms and Applying Scale, so that the physical size is maintained when the transform scale is changed.
In the case of a manually rigged avatar, redoing the rig of the model is an alternative solution. In some cases, this will be the easiest solution. Deleting the existing rig completely and using Mixamo’s auto-rigging tool should create a rig with all bone transforms standardized.