C# Scripting
The Spatial Creator Toolkit supports traditional Unity C# Scripting. If you're familiar with scripting in Unity, you'll feel right at home with the Creator Toolkit!
Click here to view the full API reference for the Creator Toolkit C# Scripting API.
Interpreted C#
C# code in Spatial packages are interpreted at runtime rather than compiled ahead-of-time. This is 5x to 10x slower than executing traditional pre-compiled C#.
Limitations
Only a subset of C# and Unity APIs are supported with replacements provided where necessary.
Click here to read more about the C# Limitations.
Packages Types
C# scripting is only supported with Space packages. Visual Scripting can be used instead for other package types.
Getting Started
Before you start programming you'll want to make sure have a code editor setup.
Click here to download and setup VSCode with Unity
Creating an Assembly
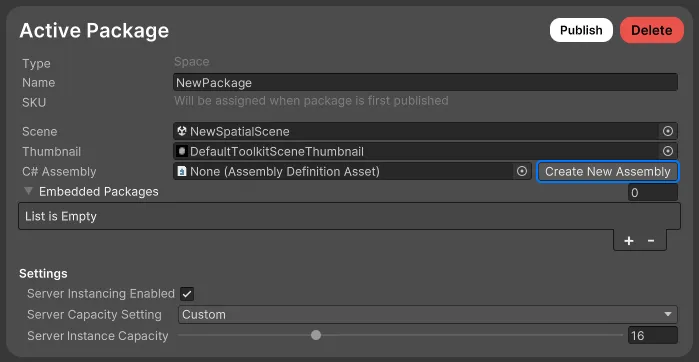
In Spatial all scripts uploaded with a space need to be contained in a single Assembly. You mark a folder and all its contained scripts as an assembly by creating an Assembly Definition asset in the folder.
In the toolkit this can be done quickly by clicking the Create New Assembly button in the space package config.
Creating a Script
After creating an assembly you can create a script inside it by right clicking the folder and selecting Create/C# Script.
If your script is not in the same folder as the assembly definition, or one of its sub-folders your script will not be uploaded to Spatial.

Using MonoBehaviours
By default C# Scripts in Unity are MonoBehaviours. These are components that you can attach to a GameObject.
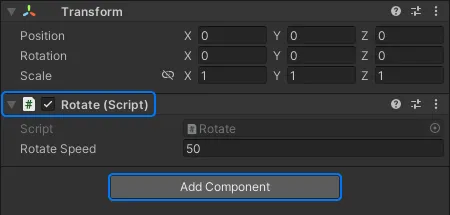
Below is an example of a MonoBehaviour that when attached to a GameObject continually rotates it on the y-axis.
Your MonoBehaviour can then be added to a gameObject by using the Add Component button inside the Inspector.
Using Spatial Bridge
When it comes time to interact with the Spatial platform this is done through the Spatial Bridge. This is a class that contains all the services and API's we provide.
Below is an example of using the bridge to display a popup message to the user. Note how SpatialSys.UnitySDK namespace needs to be included in order to access the SpatialBridge.
Continue Learning
If you are new to Unity and want to learn more about scripting you can follow Unity's scripting documentation and guides.
Otherwise, dive into the Spatial C# API Reference, check out our Templates or join the Spatial Community for more help and resources. We can't wait to see what you build!